iMovie Editing Basics and Music
Here are a few tips and tricks for editing with iMovie:
The Window:
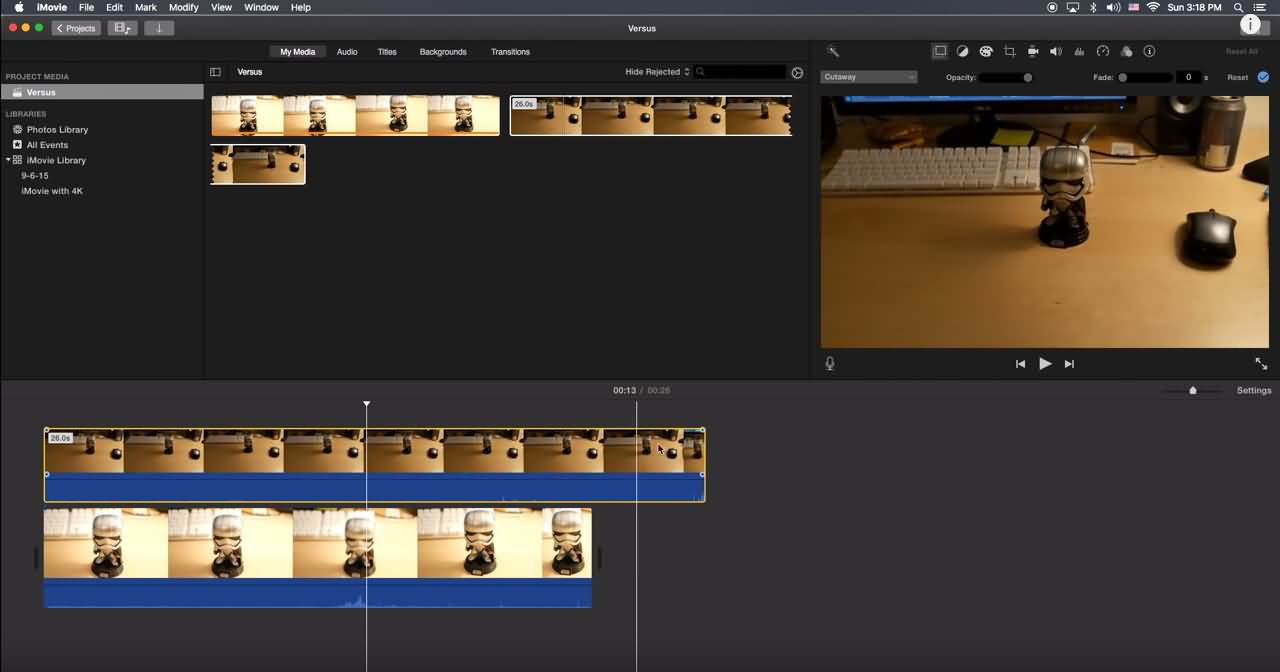
First, there are two main areas that you work in with editing, the browser and the timeline. The browser holds all of your media and the timeline is where you edit your film. Next to the browser is a window which plays media from the browser and the timeline.Keyboard Shortcuts:
Below is a list of keyboard shortcuts you may find helpful in editing your future videos.
- ⌘ I: Import Media
- Space Bar: Play/Pause
- ← (Left Arrow): Move one Frame Back
- → (Right Arrow): Move one Frame Forward
- I: In Point
- O: Out Point
- The spots within the clip where you want it to begin (I) and end (O). Does not need to be perfect because you can adjust it in the timeline.
- E: Add the Clip to the End of the Timeline
- W: Insert the Clip at the Playhead
- The playhead is the line on the timeline.
- ⌘ Shift M: Mute Clip Audio
- ⌘ C: Copy Clip
- ⌘ V: Paste Clip at the Playhead
- ⌘ X: Delete Clip
- ⌘ A: Select All Clips
- You can also do this by dragging your mouse over the clips in the timeline, this allows you to select some but not all the clips too.
- M: Add Marker
- This is a helpful tool for syncing clips to audio or remembering a place where you want to add something.
- ⌘ B: Cut Clip
- Splits the clip into two clips.
- ⌘ Z: Undo
Other Tips & Tricks:
- Need a Black Frame: You can add a black frame by going to "Backgrounds" tab and dragging the "Black" background into your timeline.
- Zoom in and Out: There are two ways to do this, (a) pinch in and out with your fingers or (b) use the scale on the right. Helpful when you're trying to precisely edit.
- Corded Headphones: It is better to edit, especially when you're messing with the audio, using headphones that plug into the computer instead of bluetooth.
- Adjust the Clip in the Timeline: If you click right by the end or beginning of a clip you can either shorten it lengthen it. This is where it helps to be zoomed in.
- Another shortcut to help with this is the Trim to Playhead feature. You could lengthen the clip more then needed, use the arrows to find the perfect place to cut it, and then trim to the playhead.
- Note: If the playhead is closer to the beginning of the clip it'll trim what is before the playhead, if it's closer to the end it'll trim what is after the playhead.
- Alt /: Trim to Playhead
- Want to Add Music: The best way to do this is find a version of the song on YouTube and use a Youtube to MP3 Converter, like the one I linked there. Once it's downloaded you'll import the audio into iMovie and drag it into your timeline.
- Using Still Images: iMovie annoyingly adds the Ken Burns affect to any still image you add. There are two ways to change this:
- (a) Click "iMovie" → "Preferences" → you'll see "Photo Placement," it's already on "Ken Burns" and you can change it to "Fit."
- (b) Find the "Cropping" symbol above video playback and select "Fit."
- Titles and Transitions: Play around with these if you want. Two quick things:
- (a) Transitions are always 1 second long, you can change how long they are by double clicking on the transition and entering your desired length of time.
- (b) Titles can be added over video, still images, or the end of the timeline to be black.
- To layer it over media, drag it down into the timeline and hover it over the media where you want to add it.
As you are exploring iMovie, come to me with any questions that you may have.
